How to Customize Owner, Author and Copyright Settings of Your Canon EOS Camera
Absolutely all modern Canon EOS cameras allow customization of up to three textual settings: owner name, author name and a copyright string. What's the deal with this and why it might be useful? Let's find out!
If you're already familiar with owner, author and copyright settings and know why they are useful, feel free to skip the first two parts where I explain it and jump straight to the customization step.
Owner Name Setting
Imagine a situation when you are on a trip to a foreign country and your camera gear gets stolen. You call the police and luckily they find the potential thief hot on the trail. But the thief feigns innocence, claims he was mistaken for someone else and pretends the camera had always belonged to him.
How can you prove without an access to purchase receipts and warranty cards (that feature serial numbers) that the camera's actually yours? Remember that these kind of troubles have a tendency to happen in the most inconvenient places possible when you're also short on time.
One easy way would be to demonstrate the law enforcement that camera has your name set in its internal memory. You simply enter the menu, navigate to the user settings and reveal the truth.
Yes, the burglar might be tech-savvy, knowing-in-advance what camera settings has to be reset to the factory settings right after the theft to minimize the risk of being caught. But it's at least something that might save your ass in a difficult situation.
Author & Copyright Settings
Photography is definitely one of the most creative professions popular nowadays. And when creative expression appears, so does copyright. For a hobby-level photographers protecting their work might not pose a huge problem, but for those who take photography serious it might! Images get stolen and used without a permission on a daily basis. Even the most world-renowned photographers suffer from copyright violation from time to time! What can we do to protect ourselves?
Canon EOS cameras have special settings for this purpose. You can declare yourself as an author of images taken with your camera and also apply a pre-defined copyright string. It works in a very simple way: each time you make a shot textual values of these settings get embedded into the EXIF metadata of your RAW/JPG files. This information is preserved during file transfer to your Mac/PC/Smartphone and generally it's a good idea to keep it when you post online.
What problems does this solve? First, it eases the identification of author by a photo. Remember that you can even include your contact details if there is enough space left for the text. If someone would like to buy your photo, it will be much easier for them to contact you. Second, it might help resolve the copyright issue if your images get used without your permission on some website. Once again, having your name and copyright embedded in the file might strengthen your point in a potential conflict.
Yes, the copyright act does not require you to mark your creative works with textual authorship labels in order to get protection. You get it completely automatically at the very moment the work is fixed on any tangible medium. But still it's a good idea to fill the author and copyright settings of your Canon EOS camera to help others not violate your rights by accident.
Three Ways to Customize Owner, Author & Copyright Fields
Using the camera menu
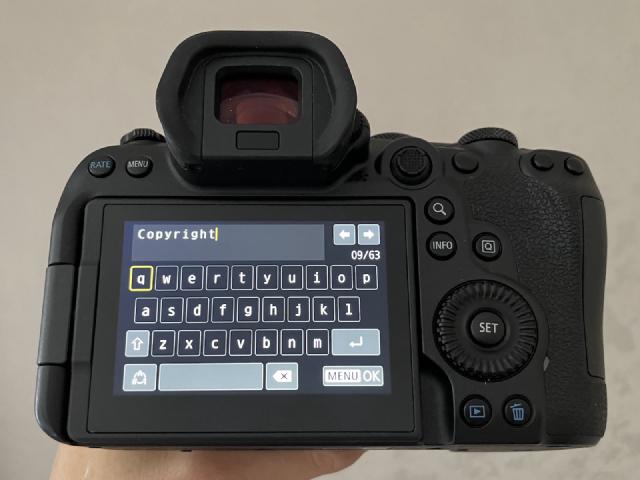
The first way of customization is to simply use the camera menu to do the job. Most of the newer Canons support it. Navigate to the main menu, find the 'Wrench' tab and select the 'Copyright information' item. You'll be presented with an interface where you can enter text selecting one letter after another using the click-wheel or a touchscreen if your camera has one. The drawbacks? It might be inconvenient and time consuming to enter long text string via this UI.
Using the official Canon EOS Utility app
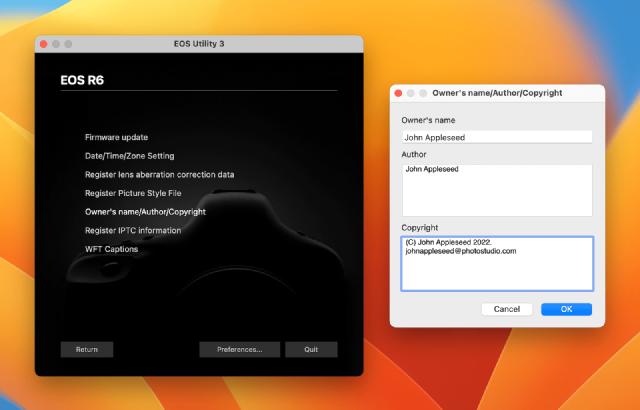
The second way of customization is to download and install the official Canon EOS Utility software. Connect your camera via USB cable and run the EOS Utility. Then navigate to 'Camera settings' window and click on the 'Owner's name / Author / Copyright' menu item. This way you can enter text on a keyboard of your Mac. The drawbacks? The Canon software is traditionally bloated and definitely not Mac-alike. Does the job, but not pretty.
Using the ShutterCheck app
The third way of customization is to use ShutterCheck. The ShutterCheck is a paid app for macOS that reads shutter count of nearly any modern Canon EOS camera, as well as some other useful bits of info. Besides that it allows you to easily customize owner, author and copyright settings of your camera. And the great news is that this functionality is available completely for free even in demo version of the app!
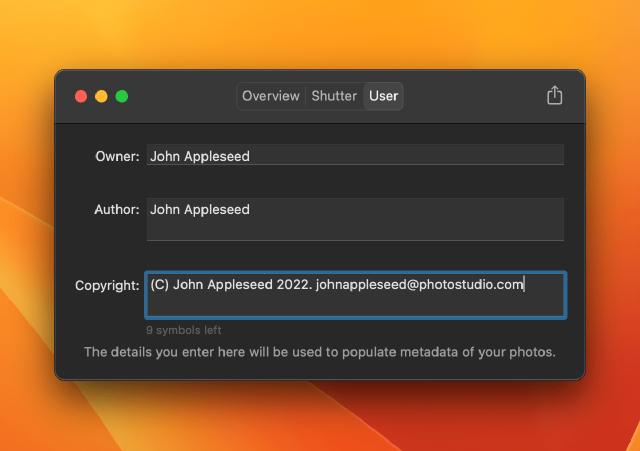
Connect your camera to your Mac via USB cable and run ShutterCheck. Your camera is recognized and the window with three information panes is brought to the screen. Navigate to the third 'User' information pane. Depending on your camera model you'll be presented with up to three text fields that you can fill with your data.
Canon has placed some restrictions on what can be entered there. First, you can only use ASCII letters. Long story short — ASCII is latin text plus some special characters. Second — the length of the text is limited with 63 characters for owner and author fields and 255 characters for copyright string.
ShutterCheck goes an extra mile to make your customization experience better. The app allows you to enter text on your native language and transliterate it automatically when the edit is done. ShutterCheck also shows you how many characters are left as you type.
Download Free ShutterCheck Demo